DIY |burlap wine bags

{ burlap wine bag }

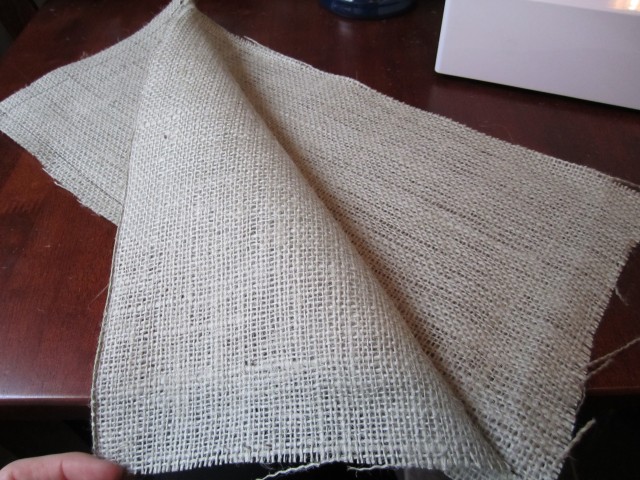
I had several yards of burlap left over from my wreath project. So, I tried to come up with a little project to use what I had a left over. I came up with burlap wine bags. Not only was I able to find a use for the burlap, but also I thought these would make great Christmas gifts. Plus, I already had all of the supplies on hand. Here’s what you’ll need…

  • burlap
  • ribbon
  • paint
  • cardboard (for stencil)

I made a few stencils out of cardboard (the thinner the better – I found that manila file folders worked best).

{ the stencil }

After using a wine bottle to measure how much fabric I would need, I ran a few simple stitches to form a sleeve.

{ sewing the sleeve }

I used the stencils to paint seasonal words on the burlap.

{ joy. }

I folded over the excess fabric at the top of the sleeve to make a large hem.

{ the hem }

Then I ran one more stitch about a 1/2 inch from the hem stitch – this created a little pocket so I could create a drawstring. I snipped the front of the drawstring pocket so I had a place to string the ribbon. After running a ribbon through the pocket (the first try wasn’t so easy!) it was finished.

{ the drawstring }

{ all finished! }

diy: magnolia leaf wreath & garland

Okay, I don’t know what the deal is lately, but I have been doing some serious crafting. Maybe it’s because I have been decorating for the holidays, so I’m motivated to do lots of little projects around the house…who knows. Anyway, this is the latest little DIY.

My sweet grandfather gathered some (and when I say some, I mean more than I could have ever used!) magnolia leaves from his yard for me. Magnolia leaves are a perfect way to bring the outdoors in during Christmas. With a little bit of floral wire and a wire wreath form I created some beautiful holiday decor. The first magnolia leaf project was a garland for my dining table. I gathered three and four leaves together at a time, and wrapped the stems with floral wire.

{ the how-to }

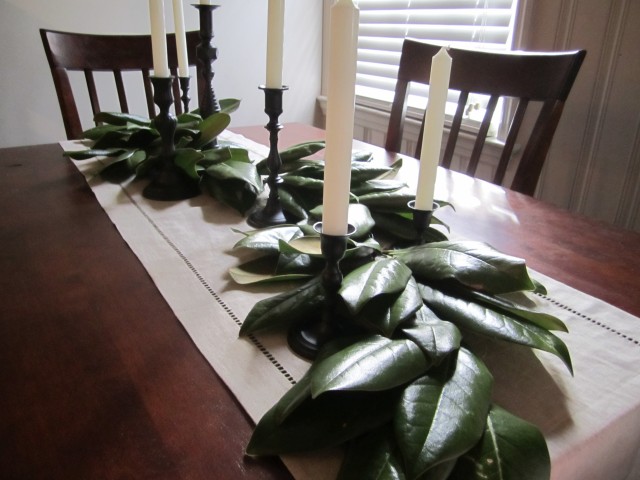
I continued to add leaves, turning some right side down to mix it up a bit. Since my dining table is not very big, it didn’t take me very long – so simple! Once it was finished I added a linen table runner and some candle sticks from here.

{ the finished product }

I wish I could say the next magnolia leaf project was just as easy! It took a lot of time, but I think it was totally worth it. It really makes such a statement in my living room. I took a large wire wreath frame and used the same technique that I used for the garland – I wrapped a few leaves together with floral wire, then used the wire to attach them to the frame. With the addition of some brown ribbon I hung it over the large window in my living room.

{ the finished wreath }

And trust me…at the rate things are going, there are more DIYs to come!

diy: burlap wreath

BW and I spent part of the Thanksgiving holiday in Birmingham. While we were there BW’s sister and I went to an adorable little antique shop. I could have walked out with about 20 different things, but sadly I left empty handed (don’t worry I did make BW stop on the way out of town, so I could run in and grab one little thing!) The shop had these burlap wreaths that I LOVED! I snapped this cell phone pic that doesn’t quite do them justice.

{ the inspiration }

I got inspired to whip up one of my own for about 1/4 of the $$$. I loved the burlap, so I decided to incorporate that into a DIY wreath I saw here several months back.

I cut the burlap into about 60 16″ long strips. Then I tied it into knots around a wire* wreath form. 20 minutes and one big mess later (seriously, little burlap strings were EVERYWHERE!) it was ready to hang. I decided to hang it in kitchen, which usually gets neglected when it comes to Christmas decorations.

{ the finished product }

*the directions in the link call for a foam wreath form, but I used wire. 1. because it was cheaper and 2. because it allowed me to cut my burlap strips a little shorter, because they did not have to wrap all the way around a foam form.

diy: chic candlesticks

On recent thrift store outing (okay, not so recent…BW and I were there looking for Halloween costumes, but it’s just taken me a while to finally get around to the project…irrelevant) I stumbled across these beauties. And when I say beauties, I mean heinous 80’s brass candlesticks. But they were only 50 cents each and I loved the different shapes and sizes, so I was convinced I could make them into something beautiful. I got some pointers from this simple DIY. After a little TLC and a few coats of spray paint, voila! beautiful candlesticks. See the transformation below…

{ I wiped the candlesticks down with a damp cloth. they were pretty dirty, and covered in old candle wax }

{ the candlesticks got a quick coat of primer }

{ the finished product, after two coats of an oil rubbed bronze spray paint }

I’m still not sure where I am going to put them, but for the time being they will be part of my Christmas centerpiece. Pics of that are on the way!